Chapter 9 — Settings
Edit → Settings… opens the Settings dialog, which docks alongside the
main viewport so you can see edits live-update on a real model. The
dialog has four tabs: Defaults, Rendering, License, and
Experimental.
Settings persist to a JSON file (settings.json) in the app's per-user
data directory — Windows AppData, macOS Application Support, etc.
Edits save automatically; there's no "Apply" button.
Defaults tab
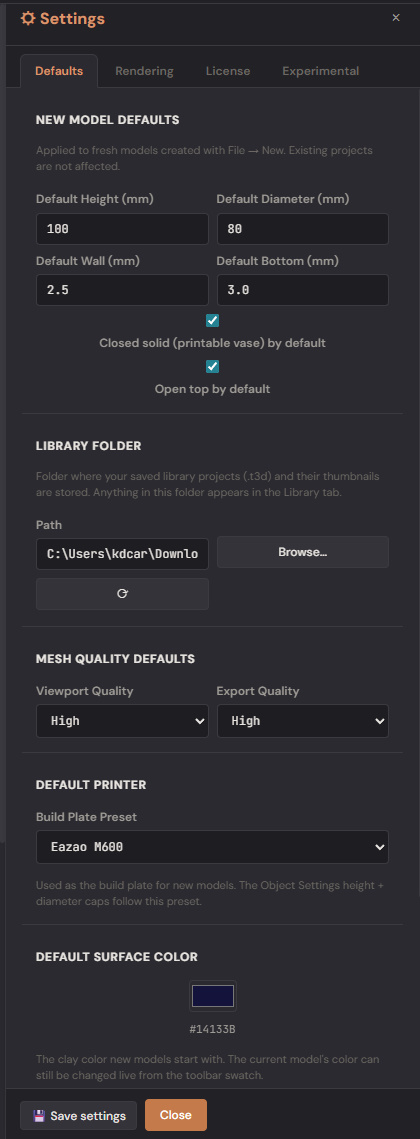
The Defaults tab controls global app preferences — UI text size and
what File → New produces. Tweak these once and every fresh model
starts the way you want.
Display
- UI text size — global multiplier for every label, control, panel header, and button in the app. Range 85 % – 150 %, default 100 %. Useful on high-DPI monitors (drop to 90 % to fit more on screen) or for accessibility / large-print (130 % – 150 %).
- Quick-set buttons land you on 100 % / 115 % / 130 % / 150 % in one click; the slider gives you 5 % granularity in between.
- Changes apply live and persist across sessions. Layouts are tested through the full range, but very small toolbars on narrow windows may wrap above ~140 %.
New Model Defaults
- Default Height (mm) / Default Diameter (mm) — starting size.
- Default Wall Thickness (mm) / Default Bottom Thickness (mm) — cavity-related defaults applied to new models.
- Default Closed Solid — most users want this on (a hollow vase).
- Default Open Top — keep on for vases, off for sealed bottles.
Quality Defaults
- Default Viewport Quality — Low / Medium / High / VeryHigh / Ultra. Higher = smoother in the editor but slower refresh; a textured body wants at least High to not alias.
- Default Export Quality — independent of viewport, used by File → Export. High is the sweet spot for most exports.
Default Printer Preset — picks the build plate for fresh models. The dropdown lists every preset from the Bambu / Prusa / Eazao / WASP / 3D Potter / Stoneflower catalogues plus Custom.
Default Surface Color — the clay tint shown in the viewport. The toolbar 🎨 picker overrides per-session; this sets the starting value for new models.
Library Folder — where saved-to-library projects live on disk.
Browse… opens a native folder picker; ⟳ resets to the default
location (~/Documents/DigitalClay Projects/).
Rendering tab
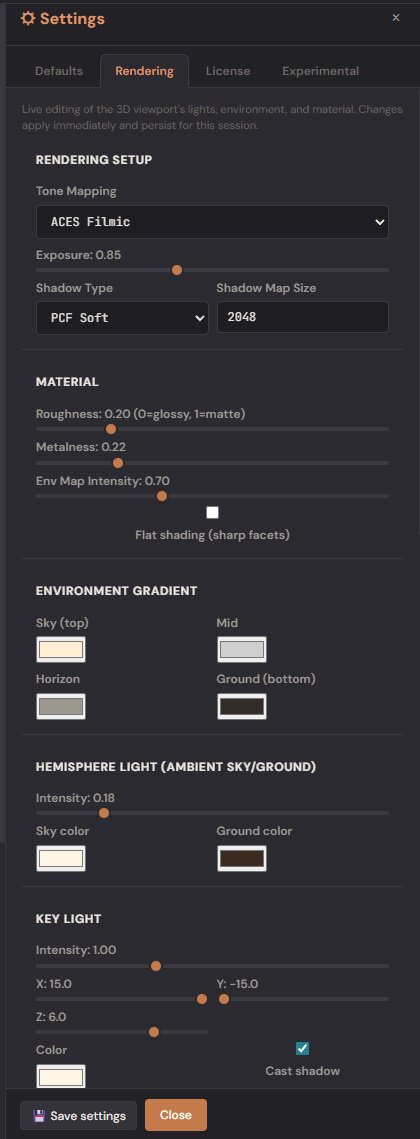
The Rendering tab is the studio. Every knob lives here so you can match a particular look (gallery white, terracotta sunset, dramatic gallery spot, etc.):
Material
- Roughness (0..1) — 0 = polished glaze, 1 = matte clay. 0.20 default.
- Metalness (0..1) — 0 = clay (default), 1 = mirror-finished glaze.
- Environment Map intensity (0..1) — how strongly the IBL contributes vs the direct lights. 0.7 default.
Environment
- Sky / Mid / Horizon / Ground colours — the four-stop gradient used to build the PMREM environment map. Drives reflections and IBL.
Lights
- Five-point studio lighting: Key, Side, Fill, Rim, Bounce. Each light has Position, Intensity, and Color. Defaults give the dramatic asymmetric rake you see on first launch.
- Hemisphere Sky / Ground — the ambient light. Two colours blend vertically across the model.
Tone-mapping & Output
- Tone Mapping — the curve used to compress HDR scene values into the 0..1 display range. ACES Filmic (default) gives a film-like shoulder; Reinhard is softer and forgiving; Cineon crushes blacks for moodier shots; Linear is raw with no tone curve; None disables tone mapping entirely.
- Output Color Space — sRGB (display) (default) is correct for any normal monitor; Linear (raw) disables the gamma curve and is useful only when comparing raw HDR values.
- Exposure (0.5..2) — overall brightness. 0.85 default produces flatter highlights on glazed clay.
- Shadow Type — PCF Soft (default) gives smooth shadow edges via percentage-closer filtering; PCF is sharper but cheaper; Basic is the fastest, hard-edged option.
- Shadow Map size — soft contact shadows. Higher = sharper shadows at the cost of memory.
- Background Mode — Env Map (default) shows the PMREM gradient; Solid Color uses the colour from the picker beside it; Transparent paints no background (useful for compositing screenshots).
Mesh & Material toggles
- Side — which face of each triangle is lit. Double (default) is safe for any mesh; Front is the smallest GPU cost when the model is closed and you don't need to see the back of cavities; Back flips the normals (debug aid for inverted meshes).
- Flat shading — uses face normals instead of vertex normals so every triangle reads as a flat plane. Looks polygonal — useful for a low-poly art style.
- Wireframe — same line-overlay used by the toolbar's Wire button (Chapter 1 — Getting Started). Toggling this checkbox or the toolbar button is equivalent.
Copy / Paste JSON
The bottom of the panel has Copy / Paste JSON buttons. Copy your favourite preset to the clipboard, paste into a Discord post or share it as a file — the JSON is a self-contained snapshot of every render setting.
License tab
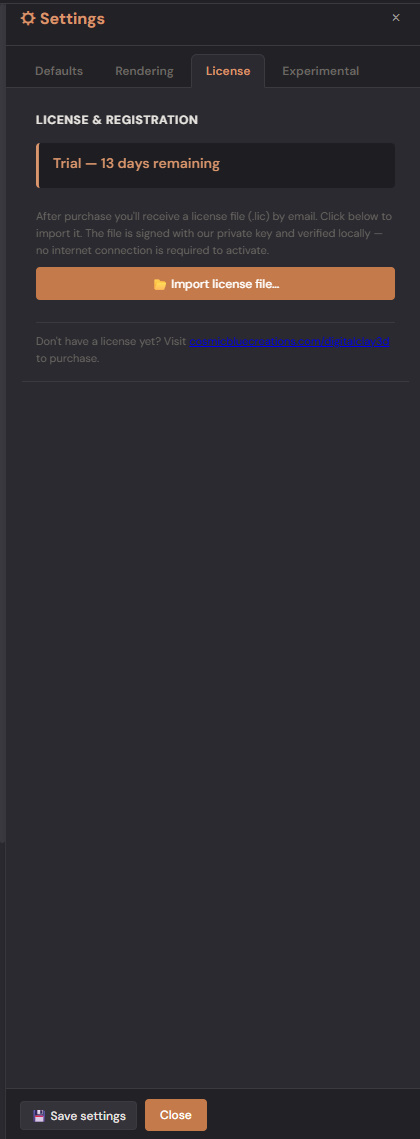
Where you enter your purchased license key. Three states:
- No license / Demo — the app is in trial mode; certain features are read-only.
- License pending — you've entered a key and the server is validating.
- Licensed — feature unlock is active.
Click Browse… to load a .lic / .dat / .json license file from
disk, or paste the key directly. The license file is portable —
copying it to another machine of yours moves the activation. (See
../legal/LICENSING.md for the back-end
issuance flow.)
Experimental tab

Three opt-in flags for in-development features. They work today but may evolve in future releases — accept the trade-off before flipping them on.
- 🏺 Pottery Wheel — exposes the Tools → Pottery Wheel entry. Real-time sculpting tools that spin the model and let you push, pull, carve, smooth, widen, narrow. See Chapter 3.
- ⎙ Printer path simulation — exposes the Printer sidebar tab. Layer-by-layer toolpath preview with gravity-aware droop prediction. Useful for "will this overhang collapse?" sanity checks before printing.
- ◬ Multi-Object Lofting — exposes the Lofting Mode dropdown in the Shape tab when you're in Lofting mode. Lets you place up to 8 primitives per layer with topology-changing transitions via SDF + Marching Tetrahedra. See Chapter 2.
Note on auto-enable: when you load a project that uses an experimental feature (e.g. a multi-object loft
.t3d), the relevant flag is auto-enabled and an info dialog explains what was activated. You can disable it again here afterward; existing multi-object projects will continue to render correctly even with the flag off.
Where settings live on disk
| Platform | Path |
|---|---|
| Windows | %APPDATA%/DigitalClay3D/settings.json |
| macOS | ~/Library/Application Support/DigitalClay3D/settings.json |
| Linux | (web demo only — settings are in-memory and reset per page-load) |
| iOS | App's Documents container — Files.app → On My iPhone → DigitalClay3D |
| Android | App's external Documents directory |
The file is plain JSON — back it up by copying, restore by replacing. Click Save settings at the bottom of the dialog to force-write immediately if you suspect autoSave didn't fire.
What to read next
- Chapter 10 — Tips & Troubleshooting for common issues and performance tuning.
- Chapter 11 — Keyboard & Mouse Reference for the one-page input cheat sheet.