Chapter 5 — Surface Effects
Surface Effects are a post-pass that runs AFTER textures. Where textures push and pull individual vertices, effects can carve through walls, raise rib networks, low-poly-facet the entire shape, or apply crystalline-lattice tessellations. The Effects tab is where you control them.
Effect types
| Effect | What it does |
|---|---|
| None | (default) skip the effect pass. |
| Strip | Recessed ring stripes around the body. Width / gap / depth tunable. |
| Voronoi | Carves Voronoi cells into the surface. With Cut Through on, punches actual holes — the lacy / cutwork pottery look. |
| Low Poly | Rebuilds the mesh as flat-shaded facets. Stylised geometric look. |
| Hex Lattice | Regular hex tessellation. |
| Diagonal Lattice | Crossing diagonal rods → diamond holes. |
| Truchet | Quarter-circle arcs on a square grid, random rotation per cell. |
| Triangulated | Alternating up/down equilateral triangles. |
| Pinwheel | Four curved petals per square cell. |
| Star (Hexagram) | 6-point hexagrams on a hex grid (Islamic geometric). |
| Curl Cushion | Chiral 4-arm twist cells. |
| Gyroid Slice | 2D slice through the 3D gyroid SDF — swirling lattice. |
| Penrose | 5-fold quasicrystal approximation. |
The Tessellation group (Hex Lattice → Penrose) shares the same controls as Voronoi — they're all cell-based, just with different cell shapes.
The Voronoi controls (also used by tessellation effects)
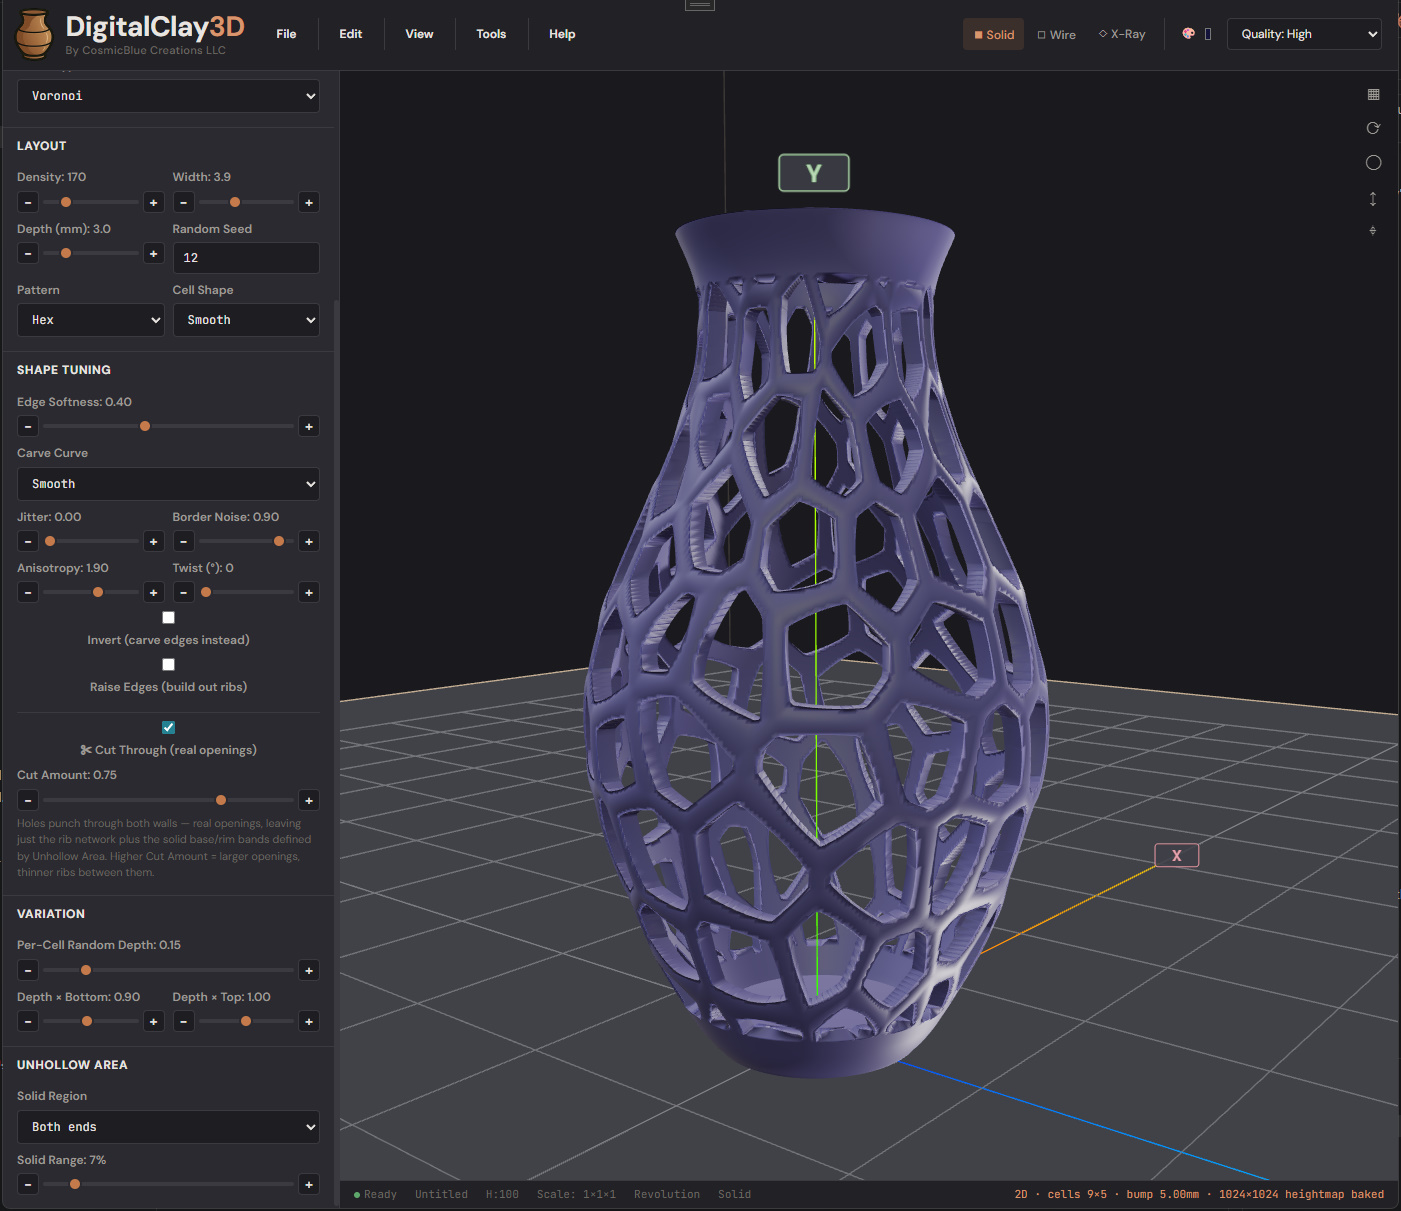
The Voronoi panel has more knobs than any other tab. Don't be intimidated — the defaults are sensible; you'll usually only touch 3–4 of them.
Layout
- Density — number of seeds (Voronoi) or cells (tessellation). 120 is a sane starting point; 200+ produces a fine lacy look.
- Width (mm) — rib-edge width threshold. Larger = thicker ribs.
- Depth (mm) — how far the cell interior carves into the wall.
- Cell Shape — Smooth (rounded) or Polygon (hard-edged faceted).
- Pattern — Voronoi seed layout: Random, Grid, or Hex-packed.
- Carve Curve — falloff curve from rib to cell centre: Linear, Smooth, Sharp (d²), Plateau (flat-bottomed).
Cut-through
- Cut Through — punches the cell centres all the way through the wall. The mesh is built parametrically with proper through-hole topology (not a post-process Boolean), so the result is watertight and slicer-friendly.
- Cut Amount (0..1) — how much of each cell's interior gets removed. 0.5 = inner half cut (clean rim); 1.0 = entire cell cut (rib-only skeleton).
Solid bands (the "cuff" + "foot")
You almost never want cut-through covering the entire vase — the rim and foot need to be solid for the print to actually stand up.
- Solid Region — None / Both ends / Top only / Bottom only. Default Both leaves both bands solid.
- Bottom Solid Band — fraction of the model height kept solid at the base. Shown when the region is "Both ends" or "Bottom only". Larger values give a thicker watertight floor.
- Top Solid Band — fraction kept solid at the rim. Shown when the region is "Both ends" or "Top only". Smaller values give a lacier upper section.
The bottom and top fractions are independent, so a cut-through vase can have a 30 % solid base for watertightness and a 5 % solid rim for a delicate lacey top in one render. Both fields default to 7 % — the reference look for the built-in Cut-Through preset.
Variation
- Jitter — 0 = perfectly aligned to grid, 1 = full random scatter.
- Random Depth — 0 = uniform depth across all cells, 1 = full per- cell variation.
- Depth Gradient Top / Bottom — multipliers at the top and bottom. Useful for "deep at the belly, shallow at the rim" looks.
- Border Noise — wobbles the cell edges along their length.
Style modifiers
- Anisotropy — 1 = round cells, <1 = vertical stretch, >1 = horizontal.
- Twist — degrees of swirl up the model — the cells spiral as they rise.
- Edge Softness — 0 = hard edge, 1 = very soft falloff.
- Raise Edges — when on, ribs are bumped outward instead of just flat. The Raise Height below sets how much.
- Invert — carve the edges instead of the interior (negative-space Voronoi).
Hex Lattice and friends
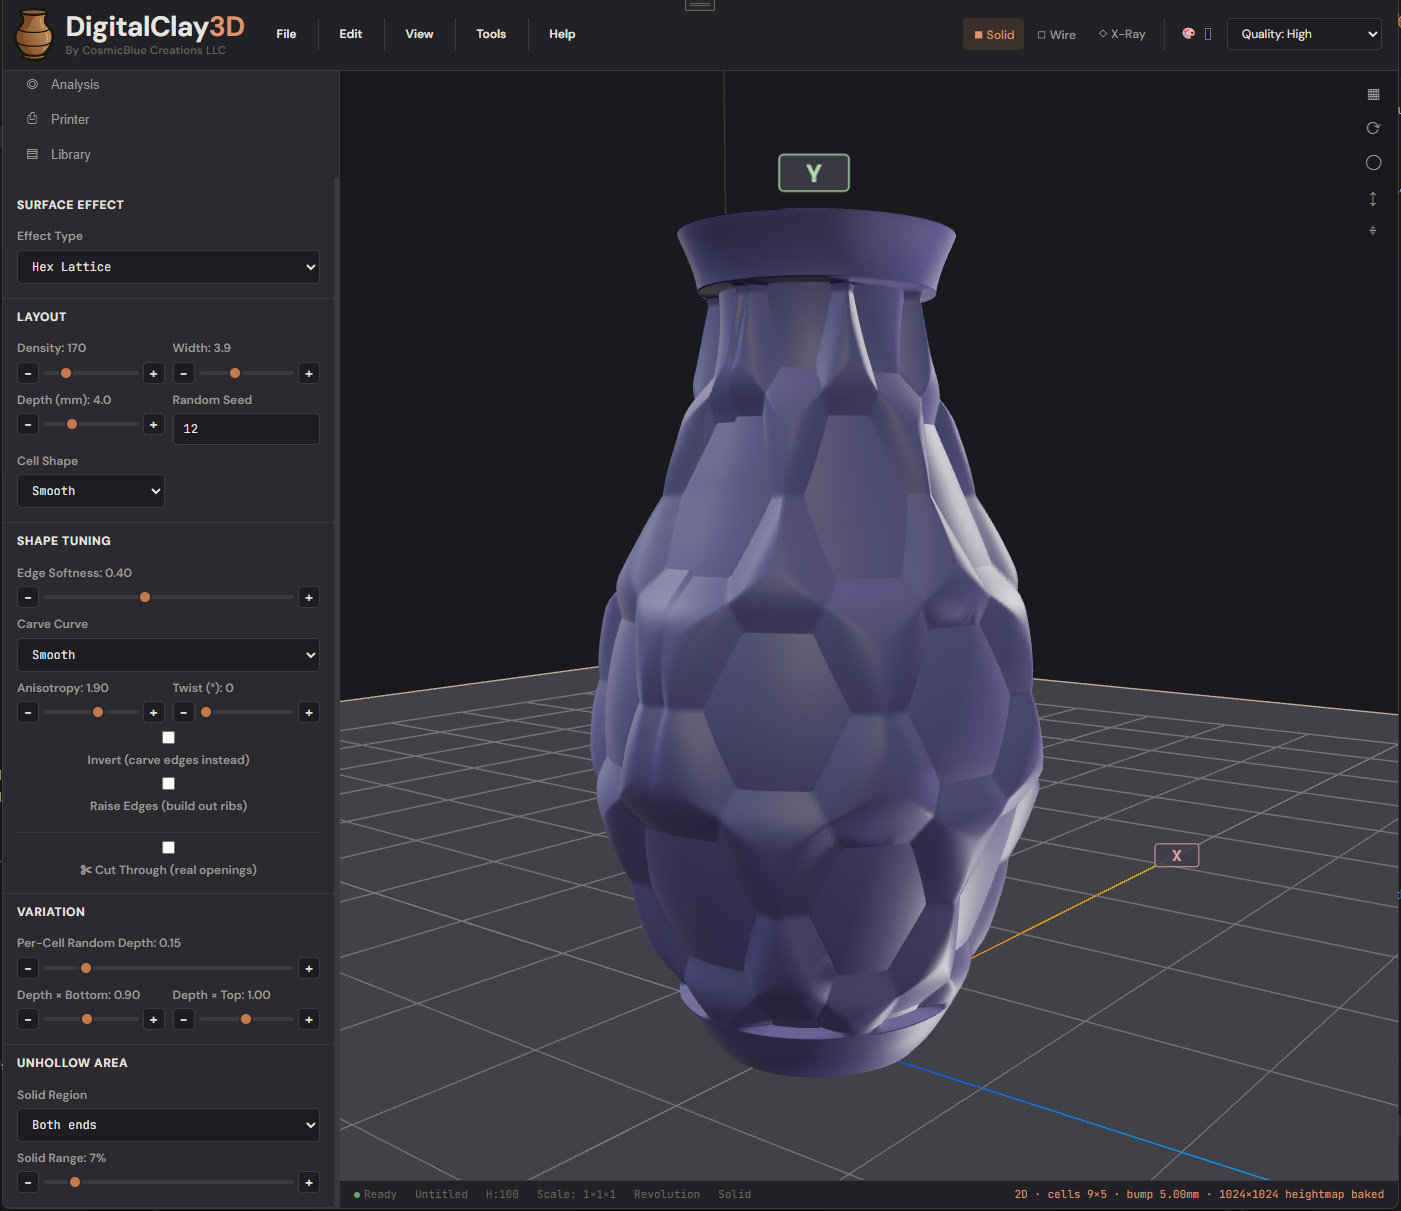
The tessellation effects (Hex Lattice, Diagonal Lattice, Truchet, Triangulated, Pinwheel, Star, Curl Cushion, Gyroid, Penrose) all share the Voronoi control panel — Density, Width, Depth, EdgeSoftness, Cut Through, etc. all behave the same way. The cell shape is what changes.
Pick the one whose cell pattern matches your aesthetic and adjust Density / Depth / Cut Through to taste.
Strip controls
When Strip is selected, a different parameter group appears:
- Strip Width (mm) — the strip's thickness.
- Strip Gap (mm) — distance between strips.
- Strip Depth (mm) — how deep into the wall each strip is recessed.
- Diagonal — when off, strips run horizontal (rings around the body). When on, they spiral up the body.
Strips don't support cut-through.
Low Poly controls
Low Poly rebuilds the mesh using flat-shaded facets (each triangle gets its own normal — no smooth shading across edges). Controls:
- Facet Segments Around — facets per revolution (lower = more visible faceting; 16 is the reference).
- Facet Rings Tall — facet bands up the body (lower = chunkier).
- Facet Flatness (0..1) — 0 = subtle (faceting only on visible edges), 1 = full faceting across every triangle.
Low Poly doesn't combine with cut-through; it's a stylistic alternative.
Combining effects with textures
The pipeline is: shape → texture → effect. So you can build a spike-textured vase AND carve Voronoi holes through it. The effect runs on the displaced (textured) vertex positions, so the cut-through holes follow the spike geometry where they overlap.
Some combinations look better than others. Voronoi cut-through pairs beautifully with Bobble or Hexagonal textures (the texture provides small surface detail, the effect provides the structural cutwork).
Performance note
At Density > 300 + Cut Through on, mesh generation can take 1–3 seconds. The viewport stays responsive but the export-quality bake on File → Export → STL is heavier. The progress modal shows triangle count so you can decide if 300k tris is enough or if you need more / less.
What to read next
- Chapter 6 — Library for saving your textured / effected vases as named snapshots.
- Chapter 8 — Export for getting a printable STL.